Share this Post
Kids of all ages enjoy acting out stories, and the instant I read the first book in the Jumbies series, I knew my children would get a huge thrill from making masks and staging plays using Tracey Baptiste’s swampy, scary Caribbean setting as a jumping off point. We played around with materials and techniques and quickly settled on this format—utilizing egg cartons to provide a quick and easy base with deep set eyes and a pointy nose, somewhat reminiscent of Carnivál or Mardi Gras masks. We opted for handles on the masks, rather than elastic, because we seriously creeped ourselves out sometimes and wanted to be able to take them off quickly! These handles also make it easy to set the masks in a base of florist foam, sand, or rocks so that they can be used as decorations—perhaps on a bookshelf full of spooky stories!
here's what we're making
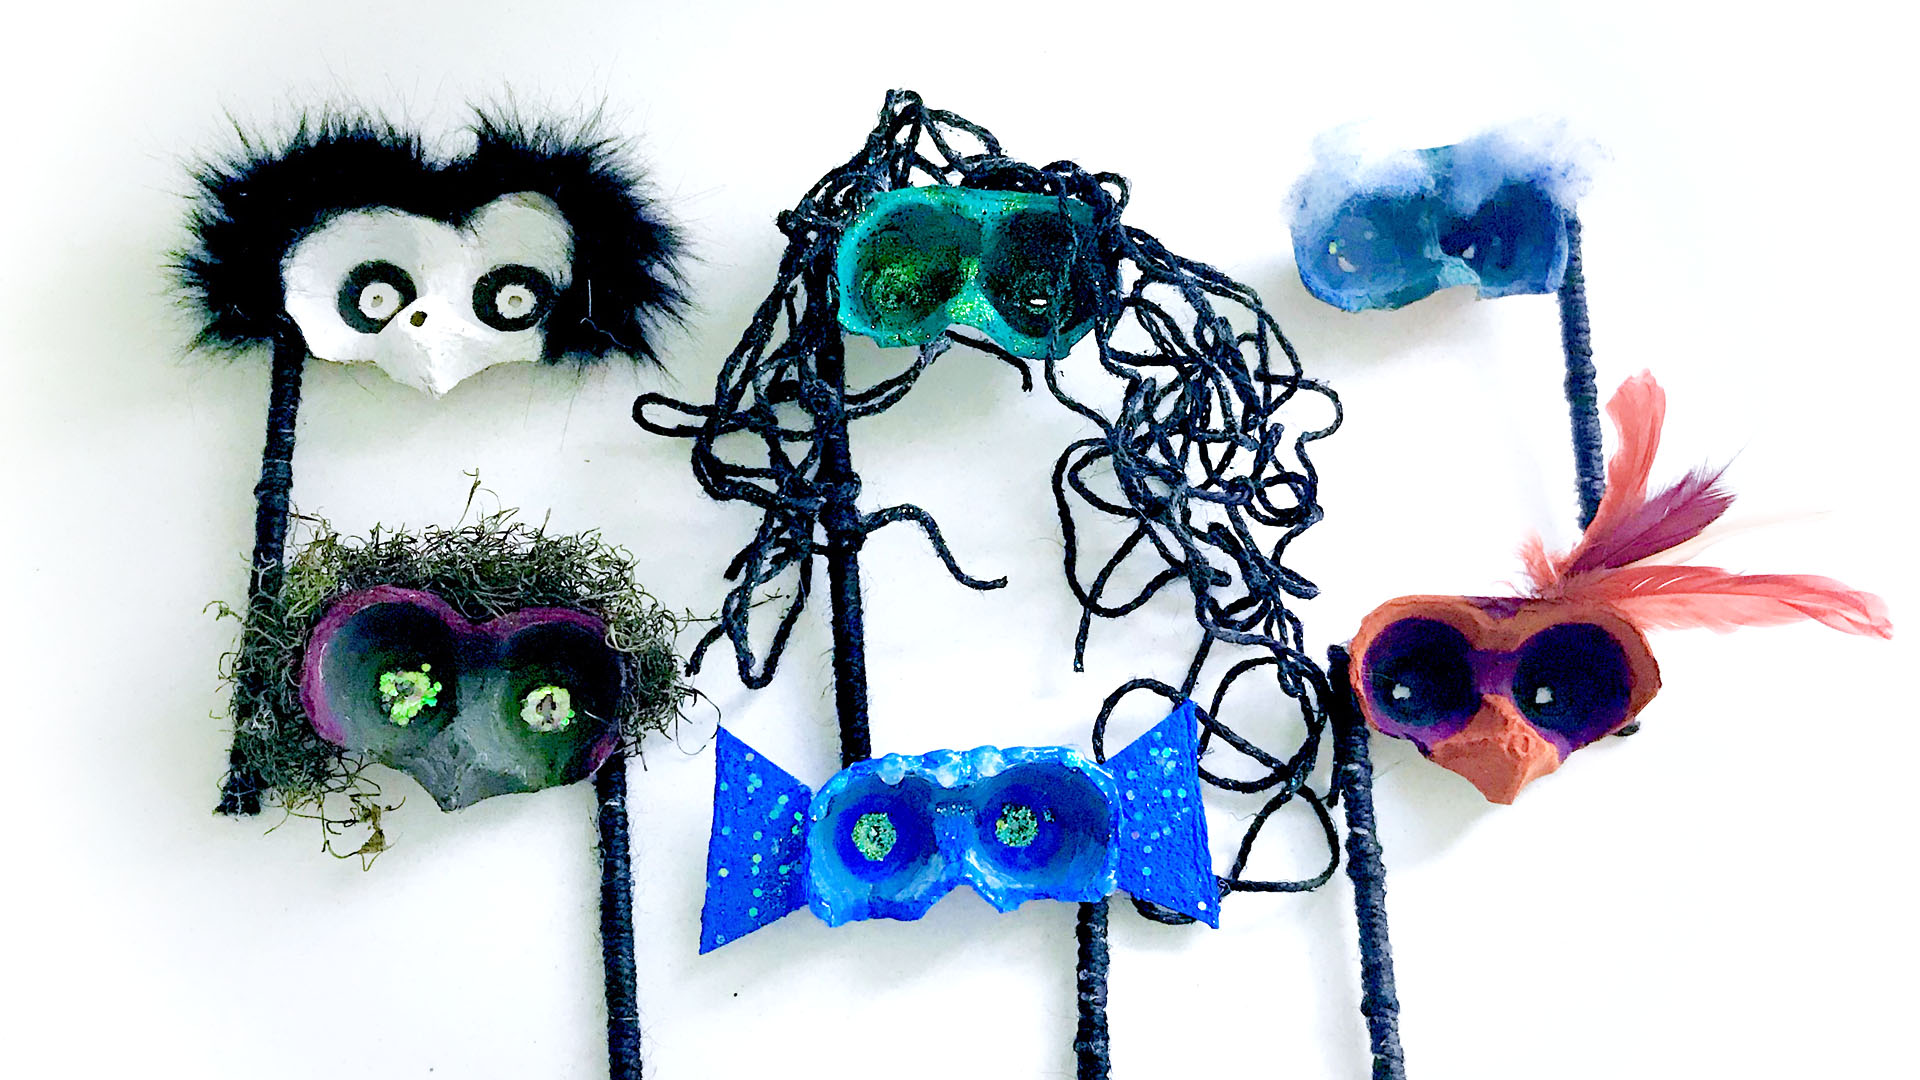
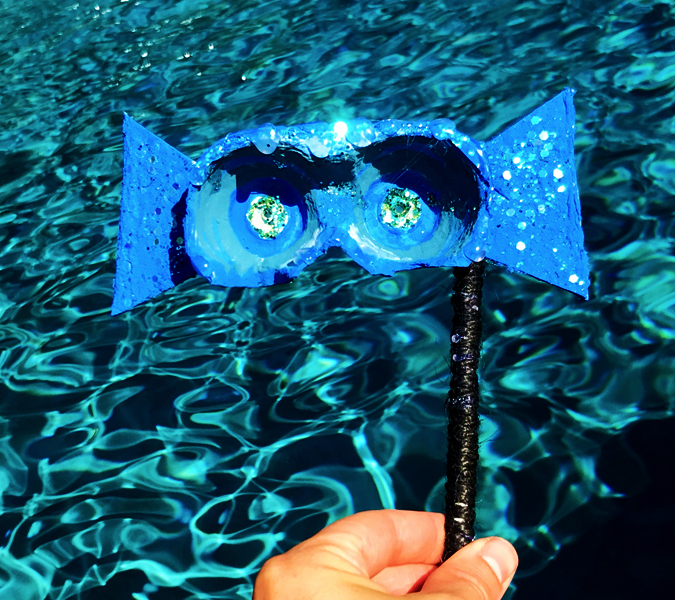
These upcycled Jumbies-inspired masks make use of egg cartons, recyclables and odds and ends from your art cupboard. We chose to make masks that reflected the themes of earth, sea, and sky found in the Jumbies series, and channeled our imaginations—and the materials on hand—to create our own creepy creatures we could imagine inhabiting each of those locales.
Teachers can encourage students to create a mask for a character, or a mask representing a location or theme, as part of a book talk or book share project.
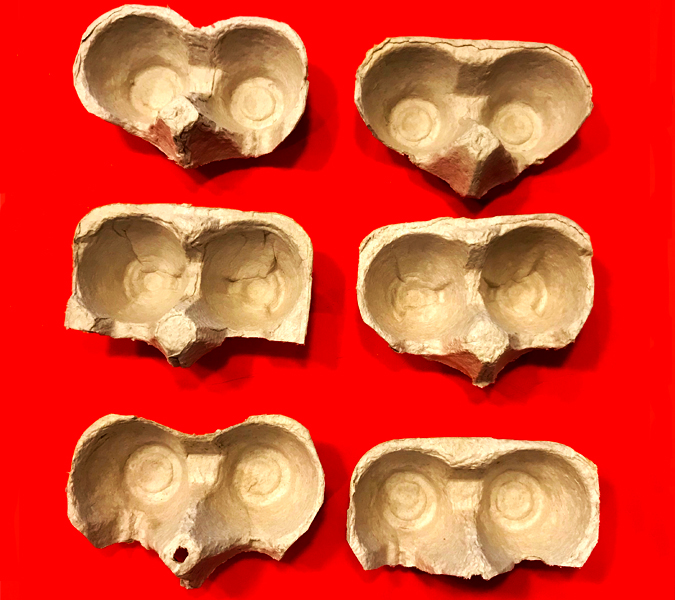
here's what you'll need
let's get started!
Instructions:
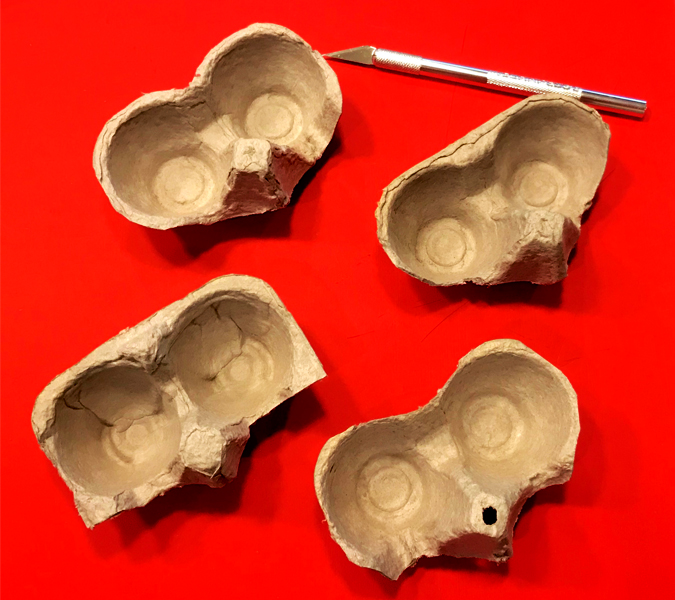
1. Use sharp scissors or X-Acto knife to cut the egg cartons into sections. The 2 egg cups at each end of the carton, along with the pointy bit in between them, make the best masks. You may want to save the middle sections for another craft. You can shape sections with your scissors to give some curved edges, make others more angular, and create a variety of nose shapes
2. Cut holes into each egg cup to make eyes. Adults/older kids can cut any shape with your scissors or X-acto knife, or allow younger kids to use a skewer or screwdriver to poke through the carton .
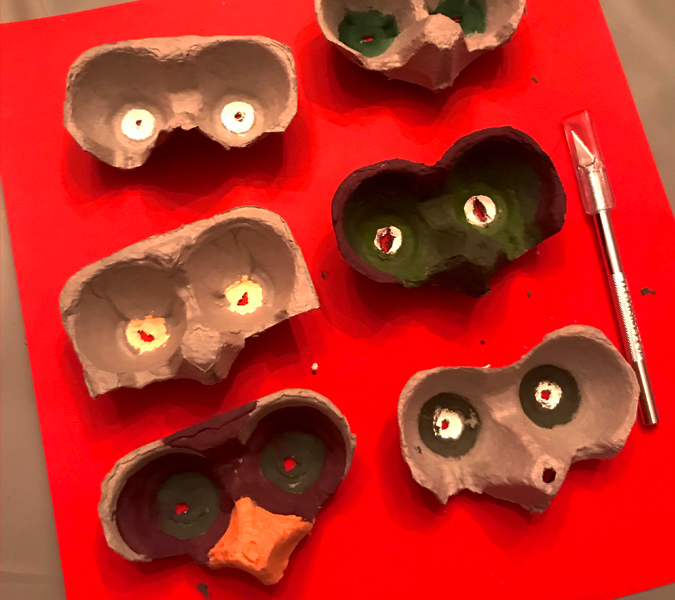
3. Spread out lots of materials and get a feel for the colors and materials you’d like to use. Paint your egg carton in colors that suit your other materials or your mood/theme/character. We found it worked well to paint a light color in the center circle of each egg cup first, creating the eye, then to paint outward from there.
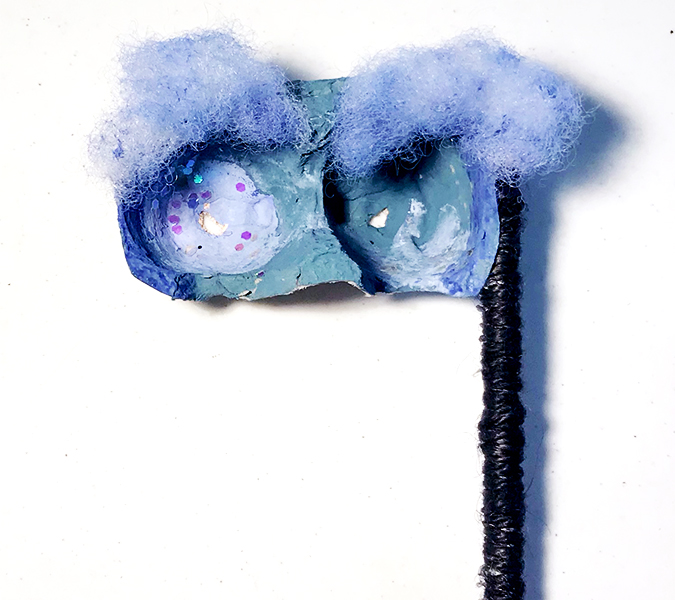
4. Once your paint has dried, use glue to add more materials. Glitter can be mixed into a half and half mixture of white glue and water, and then painted on with a paintbrush. Feathers, extra-fuzzy pipe cleaners, cotton batting, jute twine and yarn make for great additions to your mask—but there are so many options! Enjoy experimenting with new materials. Here are a few examples.
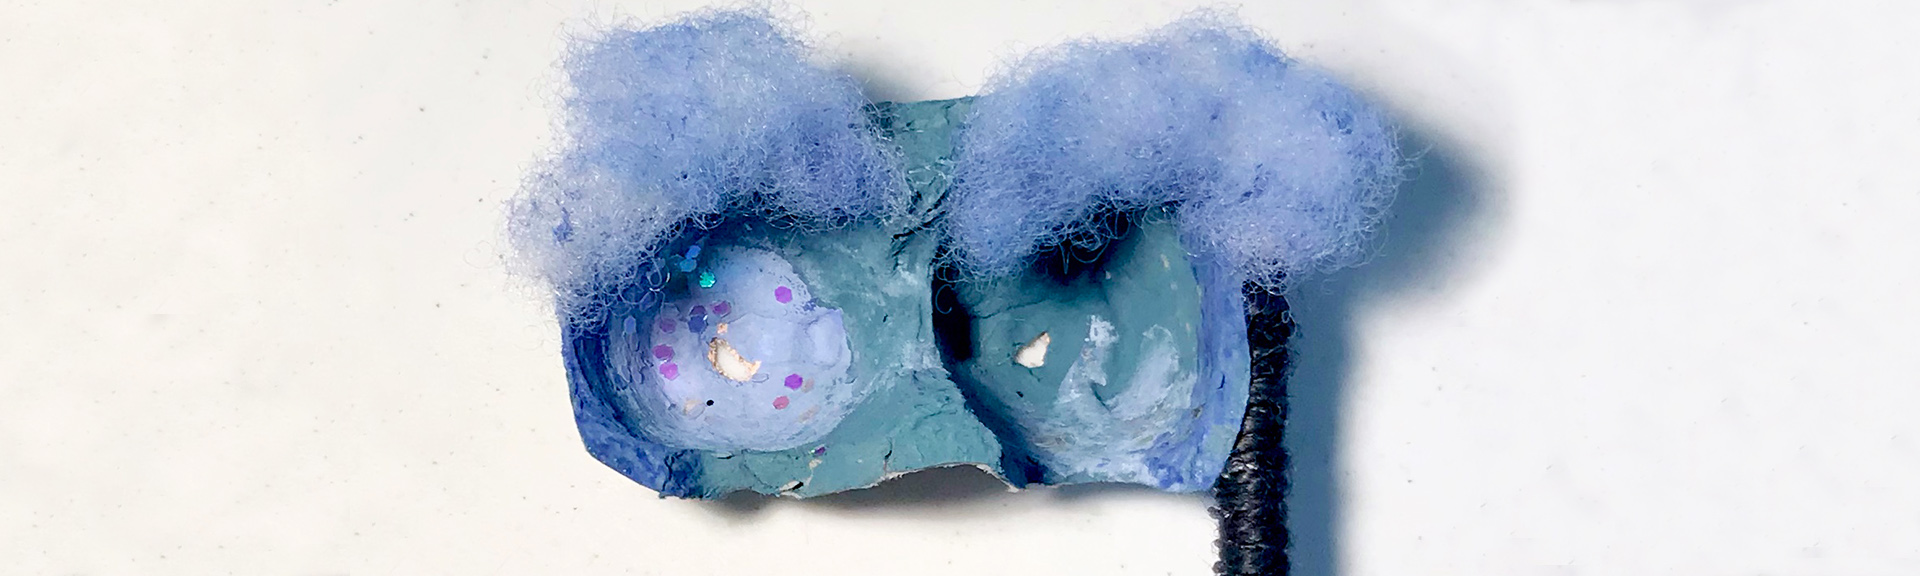
5. We used a grey washable marker to dot color on cotton batting, then sprayed it with a bit of water to make the color spread. Then we glued it on to make “storm cloud eyebrows” for this mask.
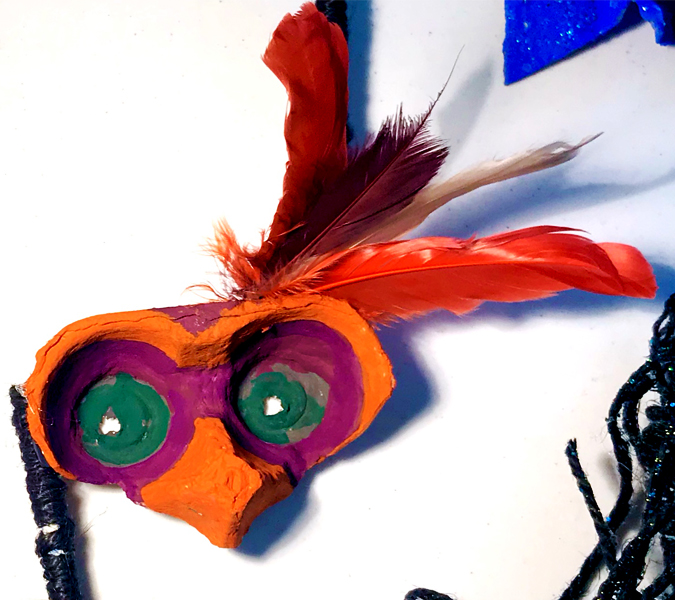
6. The fake feathers on our “trickster bird” are secured with a staple.
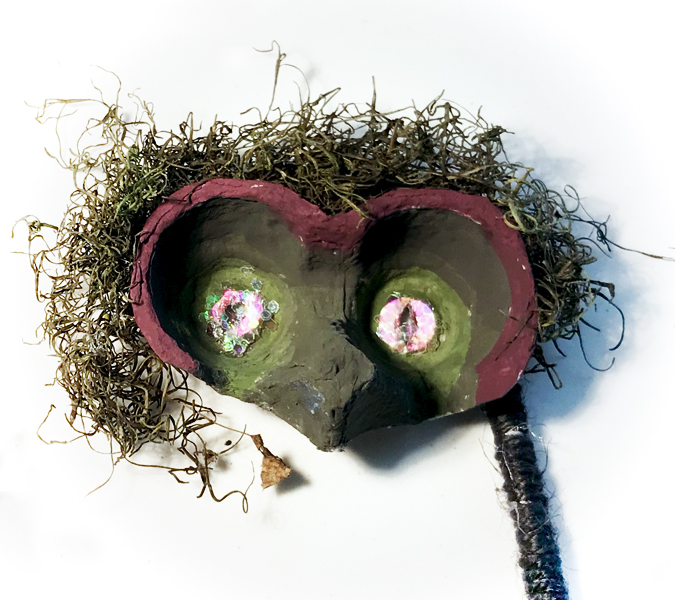
7. Florist’s moss and a few dried leaves from our yard helped us give this “swamp creature” an earthy look. The almost reptilian eyes are white paint covered with large, iridescent glitter paillettes.
8. Big drips of hot glue create the “bubble” look on our fishy face mask. The fins are cut from an egg carton lid.
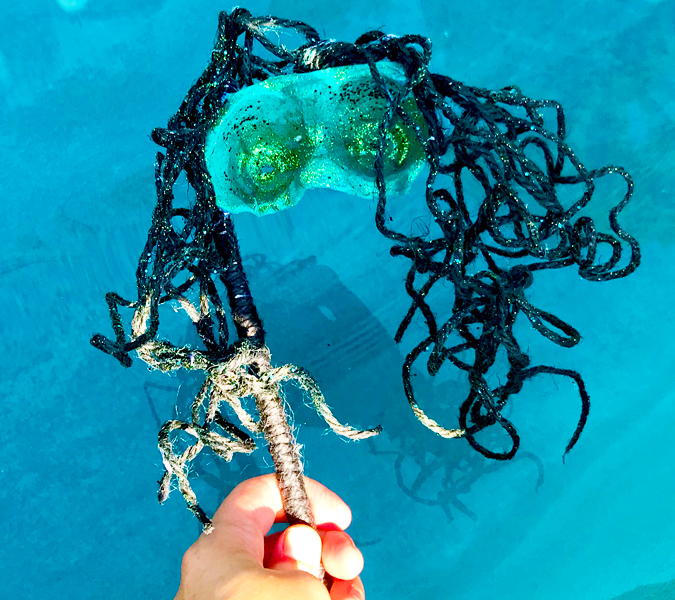
9. We achieved this wild hairstyle for our “evil mermaid” by dipping black jute twine in a mix of water, glue, and glitter. We placed a couple sticks across the top of a bucket, then bunched up the wet string, draped it over the sticks, and left it to drip-dry into dynamic shapes.
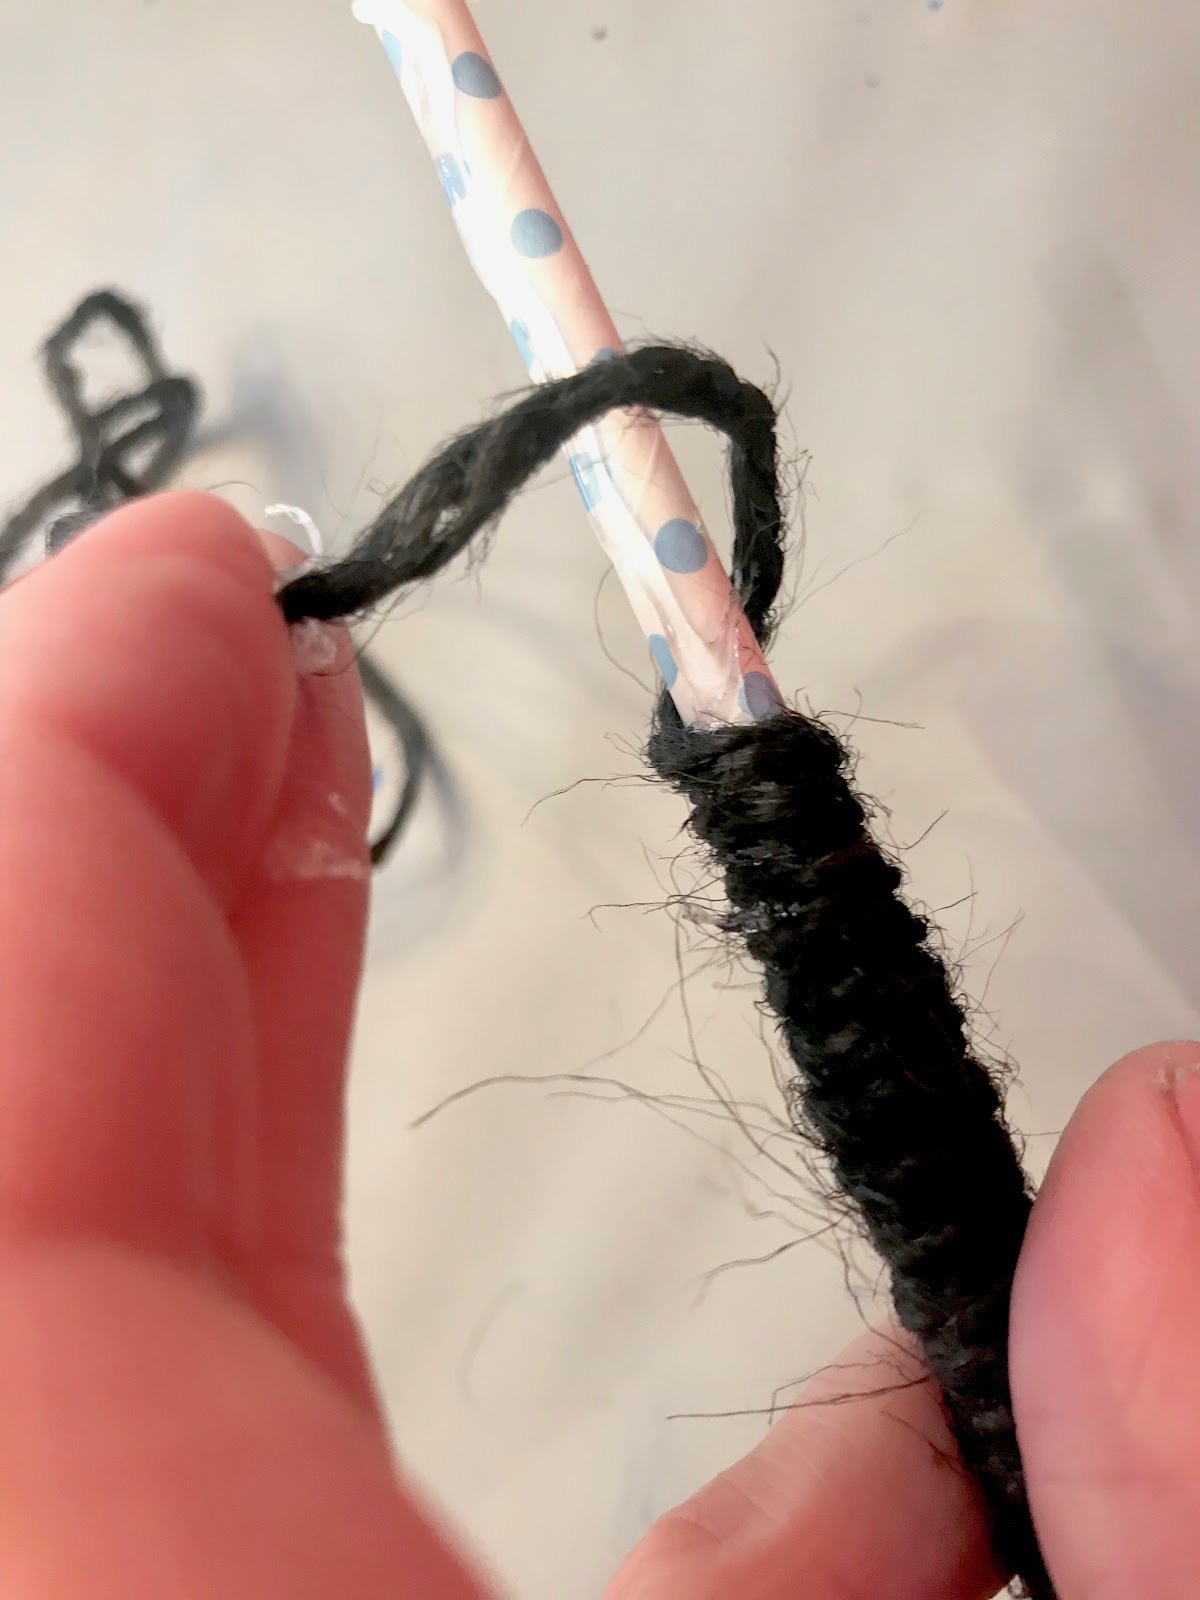
10. For the handles: put a line of hot glue or craft glue on a paper straw. Wrap twine or string around the straw. When this dries, hot glue, tape, or even staple it to the side of your mask.
We're All Done . . .
OR ARE WE?
Once your masks are dry, the fun has really just begun. Use them to act out stories, play with them as puppets, or use them to draw attention to a display of spooky books! The possibilities for imaginative play and self-expression are endless!
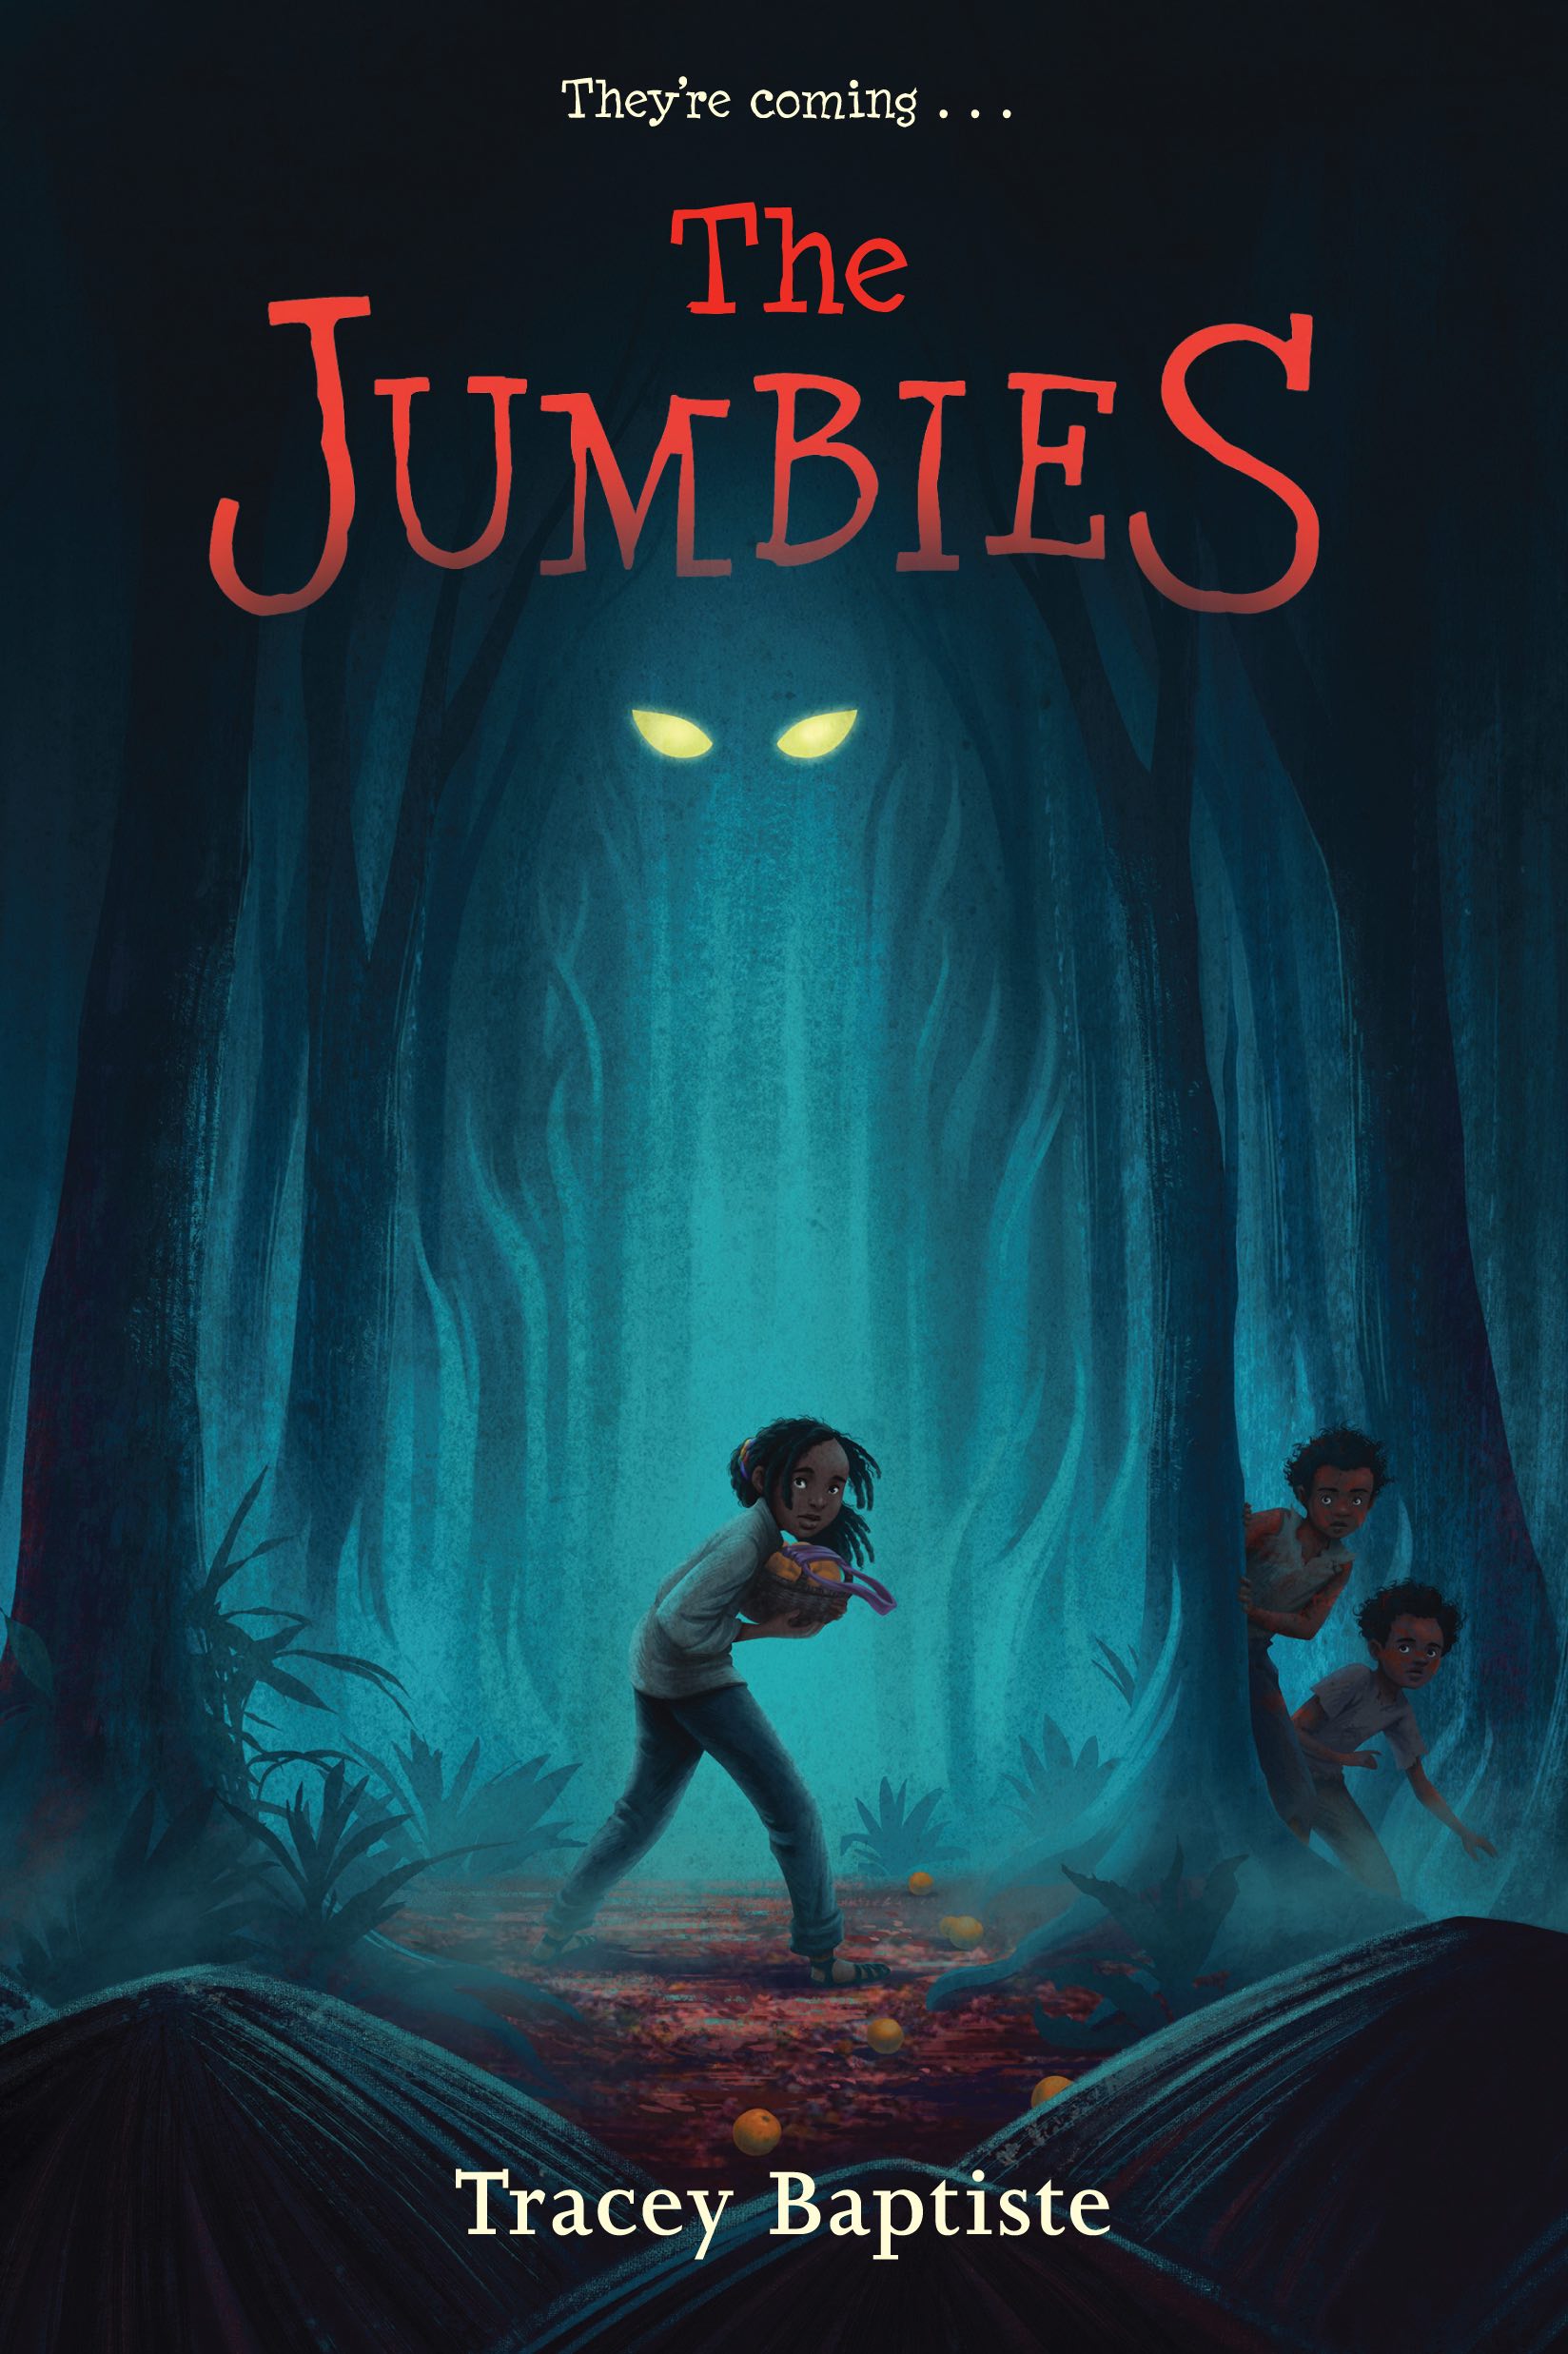
This post is part of our feature celebrating The Jumbies series by author Tracey Baptiste. Click here for more!